

Transform Your Shower Experience With A Flawless Shower Door Bottom Seal Replacement
From bold monochromatic style to vintage decor, interior design trends keep on changing. However, sleek elegance and minimalism never go out of fashion. Frameless shower doors have always been a part of the trending home aesthetics. They add elegance and give an instant posh look to the interior.
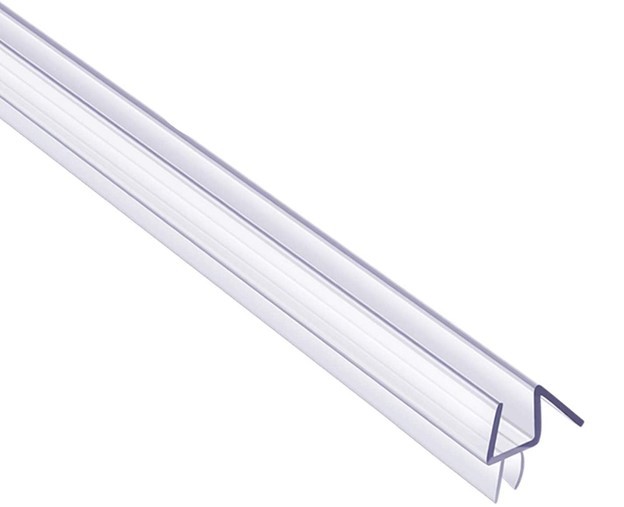
Frameless shower doors lack metal hardware and framing. Therefore, plastic seals and sweeps are attached to the bottom of the shower doors. These seals prevent the water from leaking out of the shower cabins.
However, shower door seals wear out with time due to constant exposure to water and lather. Hence, frameless shower door seal need to replace from time to time. Luckily, you can replace the shower door seal by yourself without any professional assistance. All you need to do is follow some instructions then you are good to replace the worn-out shower door seal on your own.
How often do Shower Door Seals Need to Be Replaced?
Shower door seals are generally made of rubber or vinyl. These materials are durable and typically need replacement after a few years. However, if you have hard water in the shower, the seals may deteriorate much faster. Therefore, it’s recommended to replace the seals every 1-2 years.
How to Buy the Right Size of Shower Door Bottom Seal?
You can replace shower doors quite easily if you have the right replacement parts in hand. In order to buy the right seals, measure the dimensions of the glass carefully.
The thickness of glass in shower doors usually ranges from 0.375 to 0.5 inches. If you have a standard shower door, you will get the replacement seal strip without much hassle. However, if you have a custom-made shower door, you need to measure the depth (the space between the door and the floor) and glass thickness before ordering the sweep. Read this guide to know how to DIY install a frameless shower door.
Quick Tip
For a custom-built shower door, you can ditch the measurements step. Remove the old seal strip and take it with you while purchasing a new one.
How to replace the Shower Door Bottom Seal?
If the seal is in good shape but discolored, try cleaning it. However, if the water is running down the shower door so, it is time to replace the bottom seal.

Required Tools
- Replacement seal strip
- Utility knife or scissors
- Cleaning Rag
- Needle-nose pliers
- Ammonia-based glass cleaner
Replacing a Standard Shower Door Bottom Seal
- First, open the shower door fully and inspect the bottom of the door to determine the seal attachment method. In standard shower doors, the seal strips are usually just slid into the bottom of the door. Therefore, it’s pretty easy to remove them (especially when the seal strips have become brittle).
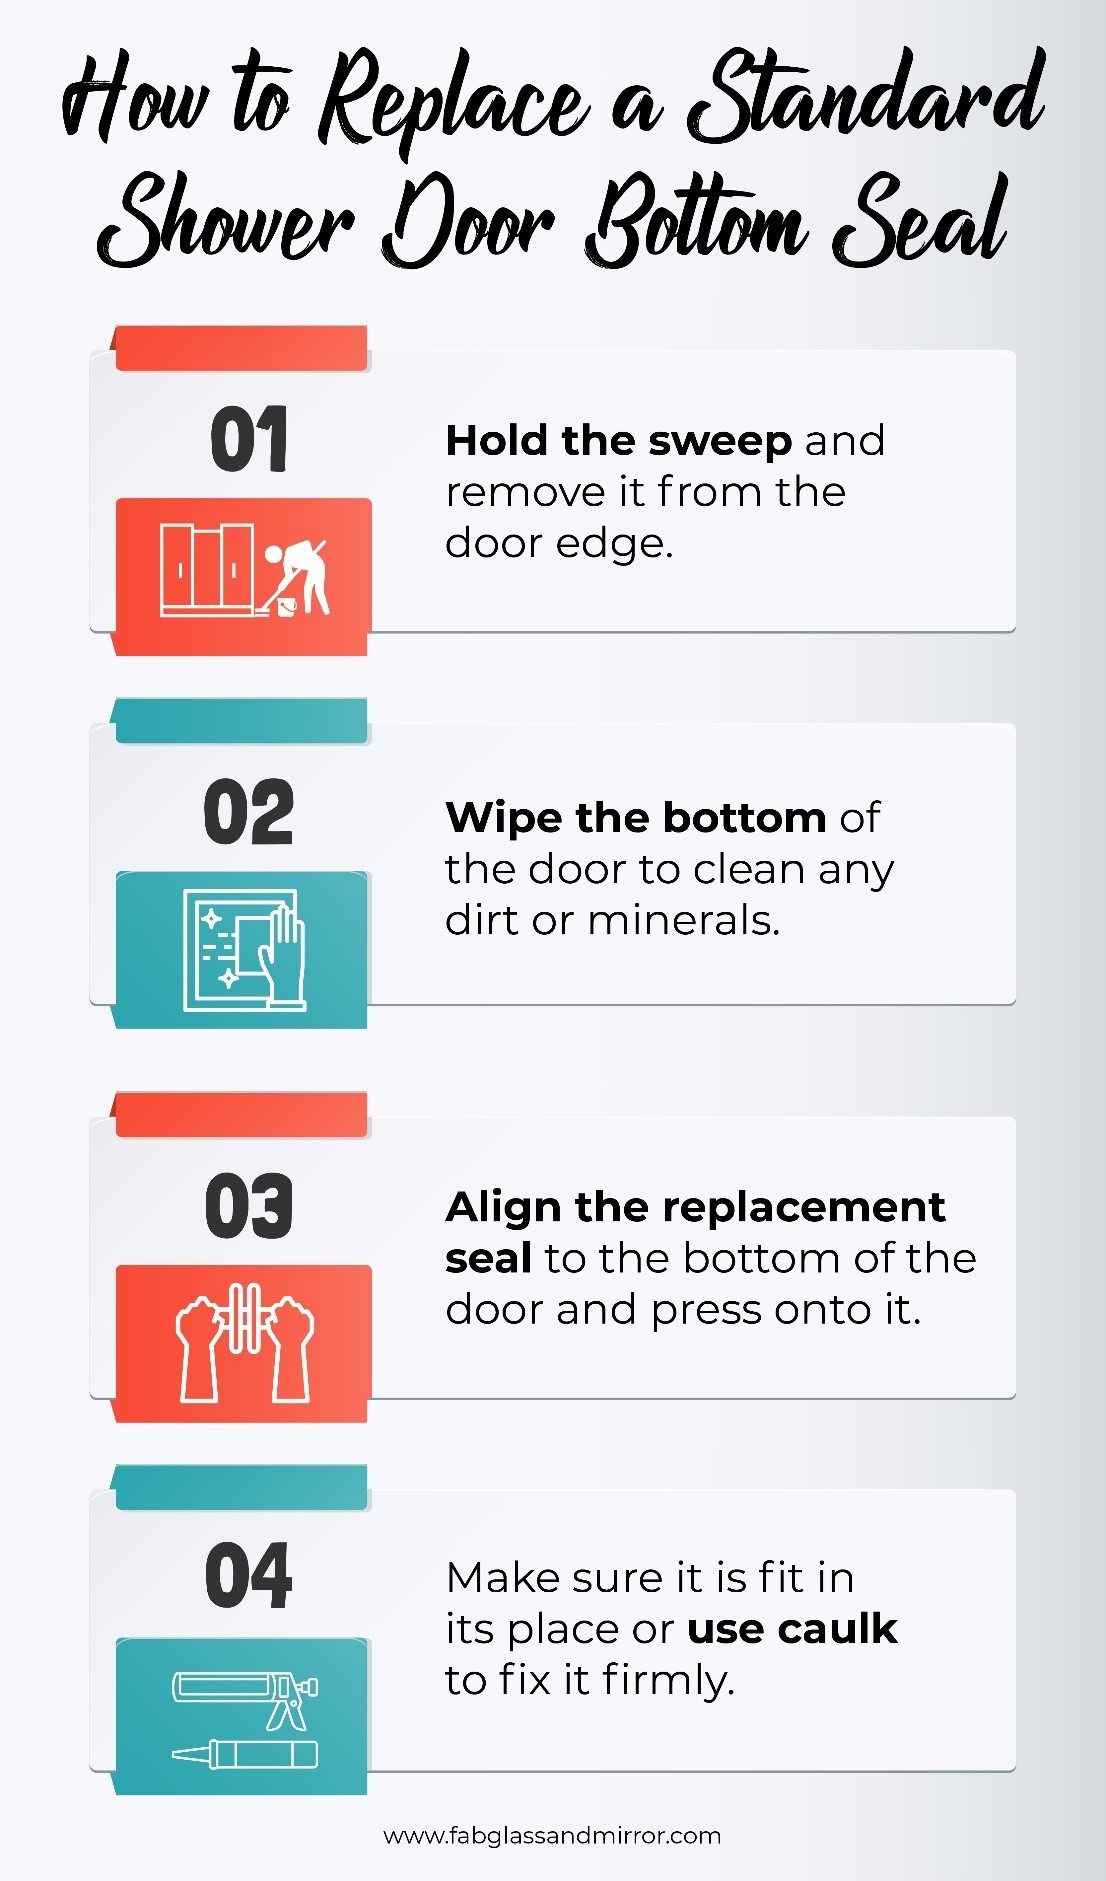
- Just hold the seal and pull it out of the door. Note that one side of the bottom seal strip will have a drip edge or lip, so install the seal by facing the drip edge inside the shower.
Note: You might need to apply extra pressure if the mineral deposits are holding the seals in place. Carefully grab the seal strip with needle-nose pliers and pull it out of the door.
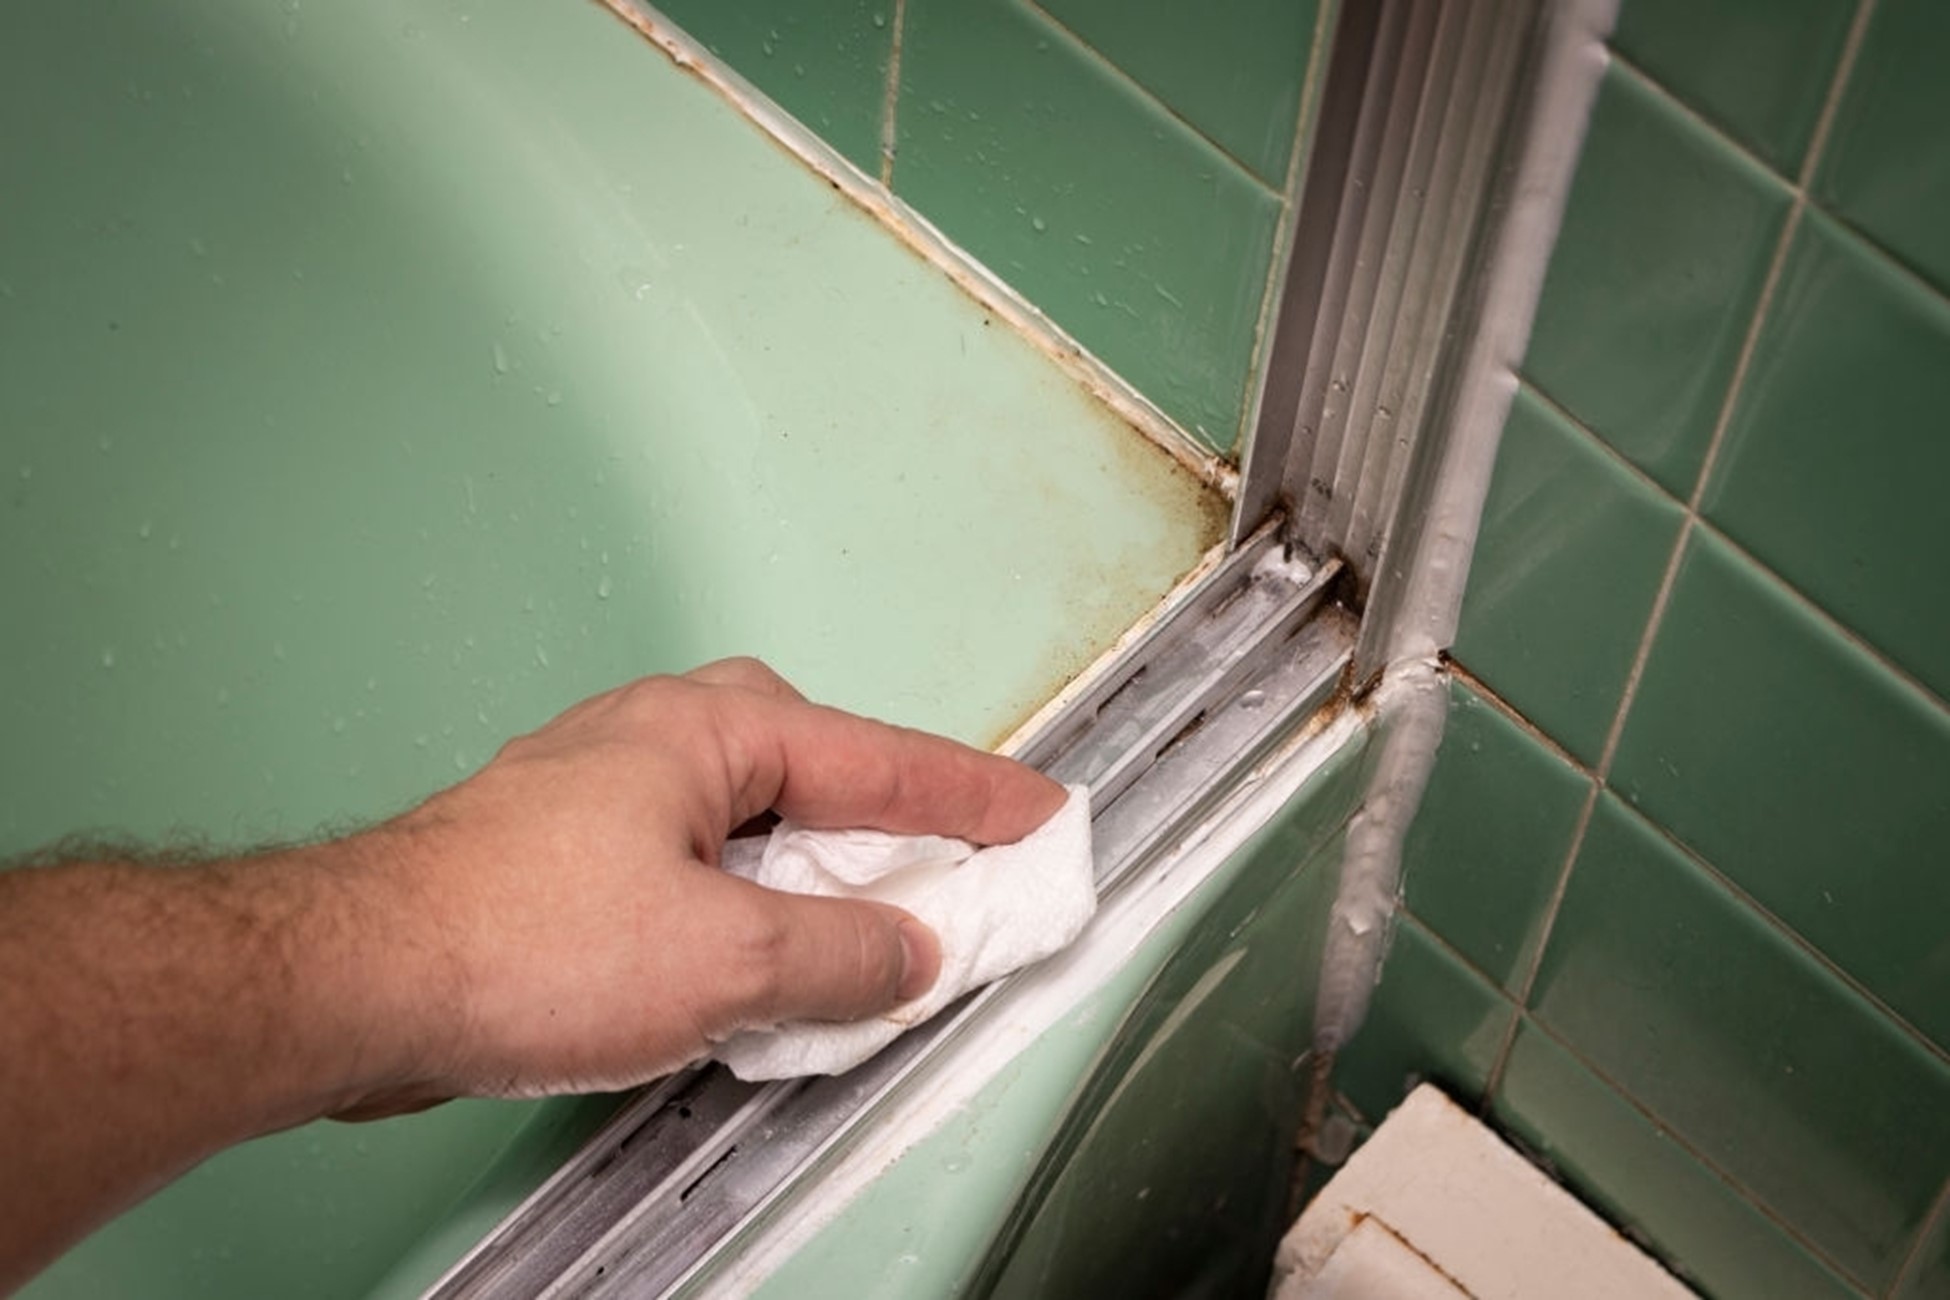
- Wipe the bottom of the door with a damp cleaning rag to remove any dirt or mineral deposits. Use ammonia-based glass cleaner to get rid of mildew and soap residues. Wipe the bottom with a dry rag.
- Now, take the replacement seal strip and align it along the bottom of the shower door. Install the strip by pressing one end of it onto the bottom of the door. Then start working your way towards the other end of the door bottom. Make sure that the seal is tight and in place.
- Once you have installed the seal, slowly close the shower door to ensure that the seal is working fine. If the seal is rubbing too hard on the floor, push the seal upwards to set it in the right position.
The bottom seal strip is replaced and your shower door is as good as new.
Quick Tip: Looking to buy a sliding shower door of your need? Click here to get the quality product all according to your requirements.
Replacing Channel Style Bottom Seals from Shower Door
Channel style seals are held in place with the metal drip. The shower doors have metal rails at the bottom that hold the seal strips. To replace the channel style seals, follow the instructions given below.
For channel style seals, remove the metal rail first. The drip rail is typically attached to the door with small screws. Unscrew the tacks to access the seal strip.
- Pull the old seal strip out of the rail channel using pliers.
- Clean the bottom of the door. Use a glass cleaner to remove dirt and soap deposits.
- Take the replacement seal strip. Cut a slightly longer length of the strip using a craft knife.
- Position the seal at one edge of the door bottom. Snap the seal onto the bottom of the door and screw it to the metal rail.
- Use a utility knife to cut the excess length of the seal strip to match the door size.
- Check your shower door for any water leakage by opening and closing it.
With that, you have replaced the shower door bottom seal strip successfully.
There are many different types of shower sweeps and seals. Regardless of the type of seal, the process of replacing the shower door bottom seal is typically the same. Use this guide to replace your shower door bottom seal. Clean the seals regularly to make them last longer.
Let us know if you face any trouble changing the seals. We will find some easy ways out for you and help you fix the issues.
If you’ve noticed water seeping out from under your shower door or damage caused by leaks, it’s time to replace the old seal. Whether you have a framed or frameless glass shower door, this simple and easy DIY project can save you time, money, and potential water damage. In just a few steps, you can get your shower door properly sealed and avoid any further issues. With the help of a few common tools like a pair of scissors, you can replace the vinyl sweeps and seals with a new rubber strip. By following this guide, you’ll be able to find the exact type of seal you need, purchase it online like Amazon or from a shop, and make sure it fits your shower door’s length. So let’s get started and save yourself a call to a professional!
Keep Your Bathroom Spotless And Water-Tight: Mastering The Art Of Shower Door Bottom Seal Replacement
Over time, the bottom seal of your shower door may deteriorate, leading to leaks and potential water damage. But fear not, with a few simple steps and the right know-how, you can easily replace the seal yourself, saving money and ensuring a watertight barrier. In this guide, we’ll walk you through the process, including essential tips, YouTube tutorials, and the different types of bottom seals available. Say goodbye to leaks and hello to a clean, efficient bathroom all year round!
Achieve A Perfect Fit: How To Measure And Choose The Right Size For Your Shower Door Bottom Seal
Choosing the correct size for your shower door bottom seal is crucial for a proper fit and effective water sealing. Remove the old seal and measure the opening carefully. Consider the type of seal needed and purchase the right size. Trim if necessary. Clean the area thoroughly and place the new seal, ensuring it sticks securely. These steps guarantee a snug fit and a leak-free showering experience. Enjoy a watertight seal and a pristine bathroom!
Step 1: Removing Your Existing Shower Door Bottom Seal
When it’s time to replace your shower door bottom seal, the first step is to remove the old one. Start by carefully taking apart the seal, paying attention to any screws or clips that may be holding it in place. Use caution to avoid damaging any surrounding parts or frames. Ensure a smooth closing by removing any debris or residue left behind. By simply following this step, you’ll be one step closer to a successful shower door bottom seal replacement.
Step 2: Preparing Your New Shower Door Bottom Seal
After removing the old shower door bottom seal, it’s time to prepare the new one. Carefully measure the length you’ll need and make any necessary cuts to ensure a perfect fit. Take into account the type of shower door, whether it’s framed or frameless. By being careful and precise in this step, you’ll ensure a successful replacement. With many options available, you can find the right shower door bottom seal for your needs.
Step 3: Checking For Any Potential Leak Points
Before installing the new shower door bottom seal, it’s important to inspect for any potential leak points. Examine the surrounding areas, such as shower door sweeps or gaps in a framed shower door. Address any issues that may need attention before proceeding to the replacement. By taking this step, you’ll ensure a proper seal and prevent future water leaks.
Step 4: Installing Your Brand New Shower Door Bottom Seal
Now that you have your brand new shower door bottom seal, it’s time for installation. Align the new seal with the bottom of the shower door opening and carefully press it into place. Make sure it adheres securely along the entire length. By following this step, you’ll successfully replace and upgrade your shower door bottom seal.
Maintaining And Caring For Your New Shower Door Seal
To ensure the longevity and effectiveness of your new shower door seal, follow these maintenance and caring tips. Regularly inspect and clean the seal with a mild cleaner to remove any buildup or debris. Avoid using harsh chemicals that may damage the seal. Inspect for any signs of wear or damage, and promptly replace if necessary. Keep the surrounding window areas clean and free from moisture. If needed, replace the shower door bottom seal promptly to prevent water leaks. By following these simple steps, you can enjoy a durable and leak-free shower door seal for years to come.
Conclusion
In conclusion, replacing your shower door bottom seal is a simple yet essential task that can greatly enhance the functionality and appearance of your bathroom. By following the steps outlined in this guide, including removing the old bottom seal, carefully selecting and installing the new one, you can achieve a watertight and leak-free showering experience. Regularly maintaining and caring for your new seal will ensure its longevity and effectiveness. Remember to periodically inspect for wear or damage and promptly address any issues that arise. By taking the time to replace and maintain your shower door bottom seal, you can enjoy a clean, efficient, and hassle-free showering experience.
Frequently Asked Questions (FAQs)
If you’ve still got questions about shower door bottom seal replacement, then these may help:
How Do You Fix A Leaking Shower Door At The Bottom?
If you’re experiencing a leaking shower door at the bottom, the most effective solution is to replace the shower door bottom seal. Over time, seals can deteriorate and lose their effectiveness, leading to leaks. To fix the issue, remove the old seal and replace it with a new one that matches the length and type of your shower door. By replacing the shower door bottom seal, you’ll ensure a tight seal and prevent water from leaking out, keeping your bathroom dry and free from water damage.
Can You Repair A Door Seal?
In most cases, door seals cannot be repaired and it is recommended to replace them instead. Over time, seals can wear out, become damaged, or lose their effectiveness, leading to issues like leaks. To address the problem, it’s best to replace the damaged or worn-out door seal with a new one. This ensures a proper seal, prevents leaks, and maintains the integrity of the door.
How Can I Improve My Door Seal?
To improve your door seal, consider replacing it with a new one. Over time, door seals can wear out, leading to issues like drafts or leaks. By replacing the old seal with a new, high-quality one, you can ensure a tight seal, preventing air and water infiltration. Choose a door seal that is compatible with your door type and carefully install it for optimal performance. A well-maintained and properly installed door seal will enhance energy efficiency, improve insulation, and create a more comfortable and protected living space.
How Long Should A Door Seal Last?
The lifespan of a door seal can vary depending on factors such as usage, environmental conditions, and the quality of the seal itself. On average, a well-maintained and properly installed door seal can last between 5 to 10 years. Regular inspection and replacement when signs of wear or damage appear will help maintain an effective seal and prolong its lifespan.
Which Door Seal Is Best?
The best door seal depends on various factors such as the type of door, intended purpose, and personal preferences. Common types include weatherstripping, bottom seals, and compression seals. It’s recommended to choose high-quality seals that are suitable for your specific door and provide a tight seal against air, water, and sound intrusion.